• Sign Up! To view all forums and unlock additional cool features

    Welcome to the #1 Explorer ST Forum and Explorer ST community dedicated to Explorer ST owners and enthusiasts. Register for an account, it's free and it's easy, so don't hesitate to join the Explorer ST Forum today!


Audio system prep...sound deadening project.

UNBROKEN

4000 Post Club
Messages
4,572
Reactions
5,346
Points
352
Location
Houston, TX, USA
#1
Figured I’d put this all in one place in case people wanna see what’s behind the interior panels.
My audio system gear is evolving...trying to keep cost reasonable but still play in the high end of things. Right now the plan is:
Nav TV Zen A2B interface
Helix DSP Pro with Director controller
Mosconi Pro 1/10, 2/10 and 4/10 amps.
Focal Utopia M midrange and tweeter up front.
illusion Audio Carbon C8 mid bass.
Illusion Audio Carbon C12XL sub
That’s all subject to change depending on my mood at the time.
I do all of my own installs so I’ve been working on the sound deadening since it’s so time and labor intensive. I have about 30 hours in it so far and still have to do the floor.
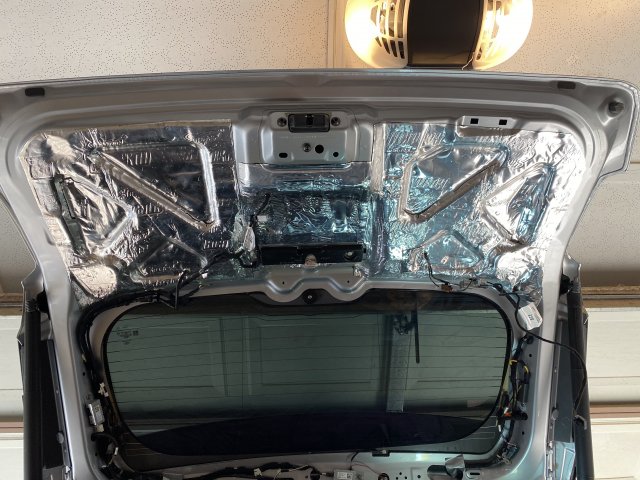
Products used are Stinger Roadkill Expert CLD, Dynamat DynaPad CCF/MLV combo and DynaLiner CCF in various thicknesses. I’ve also used a ton of butyl rope and Tessa tape for decoupling various wires, sunroof drain tubes, door crash bars, etc.
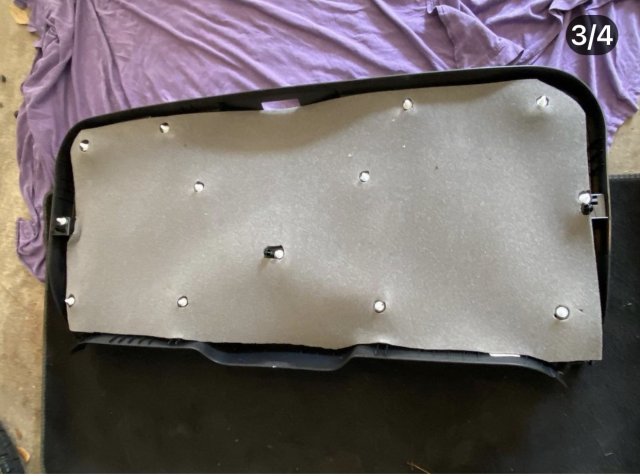
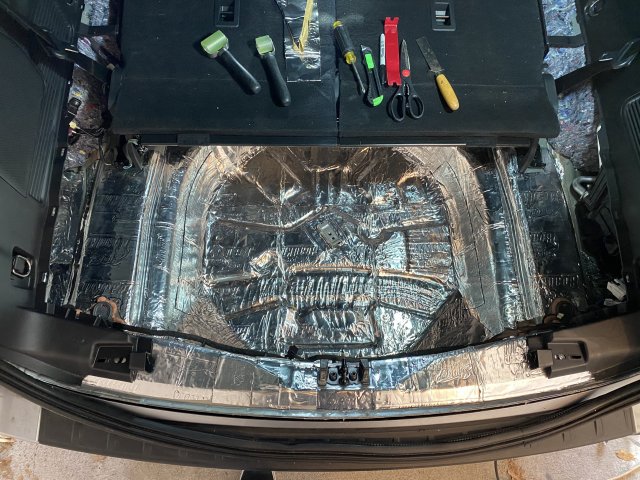
I started with the rear floor and hatch. 100% CLD and CCF/MLV combo to target road and exhaust noise. The laps weren’t taped yet in this pic of the Dynapad. 44203221-D025-4EE3-82A9-1F686199CE5A.jpeg 05DF2F0E-DE9A-4805-814F-68C6D0AC1862.jpeg 7F0EB1DA-315C-4339-B5CE-A1DB622E3B98.jpeg 4E06DFD8-91D3-4522-8A4B-DFFD2F70A911.jpeg
 

Last edited:
OP
UNBROKEN

UNBROKEN

4000 Post Club
Messages
4,572
Reactions
5,346
Points
352
Location
Houston, TX, USA
Thread Starter #2
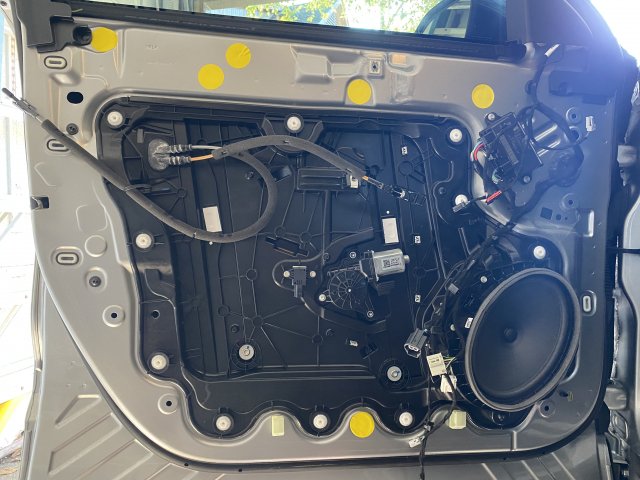
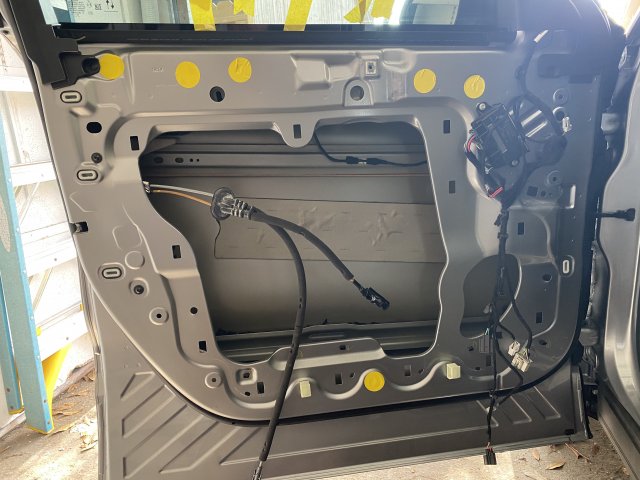
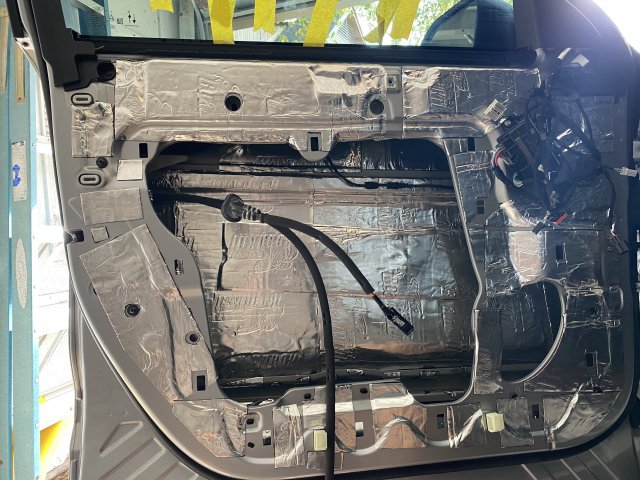
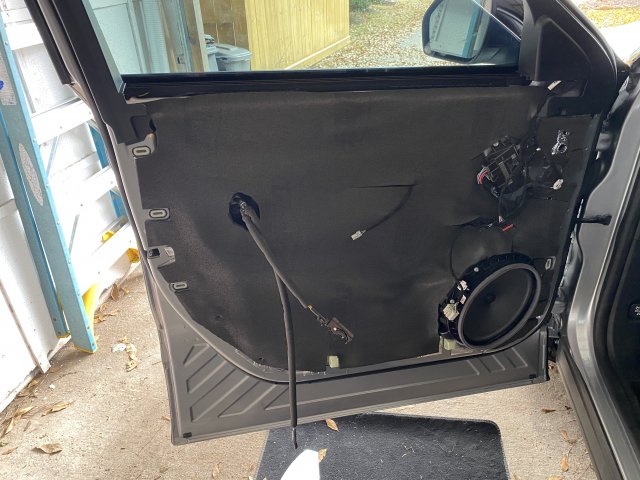
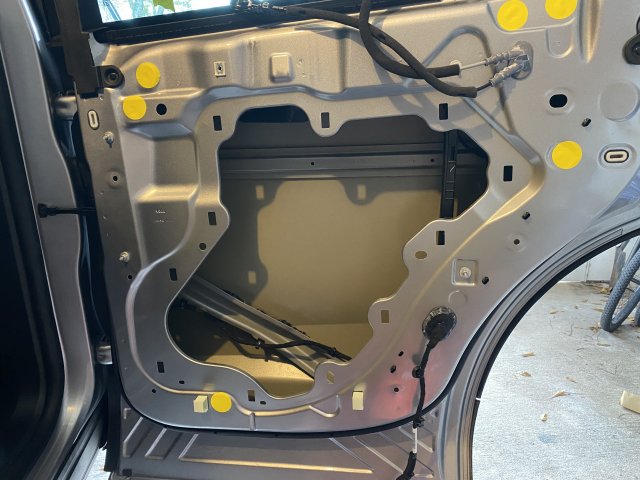
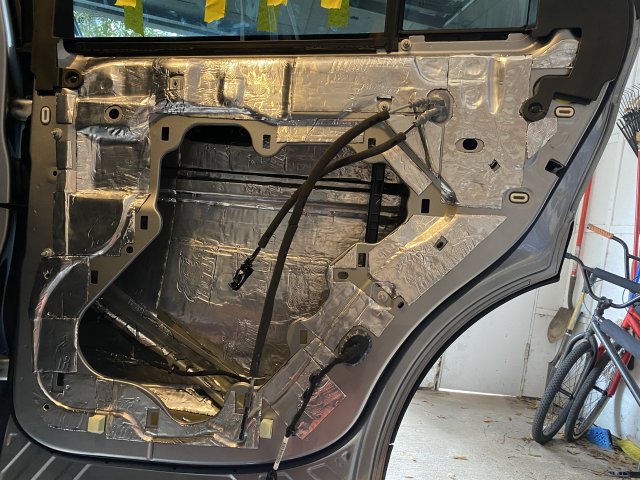
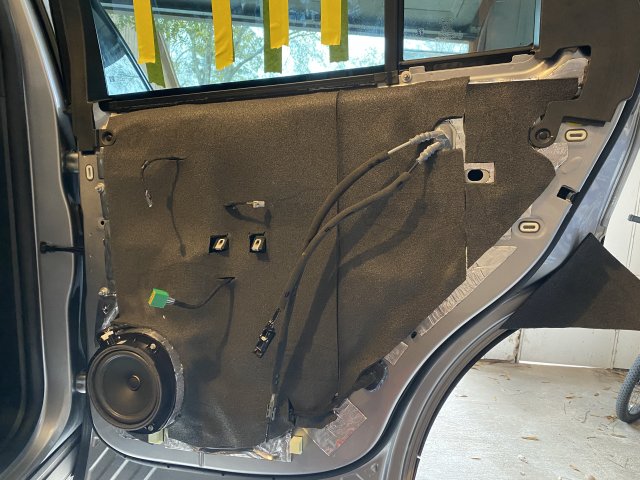
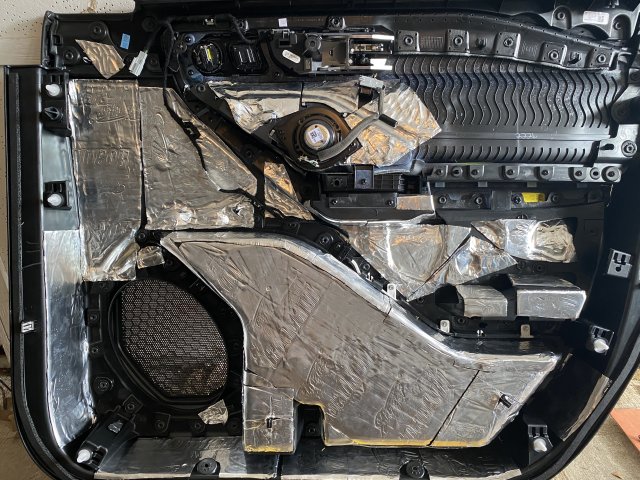
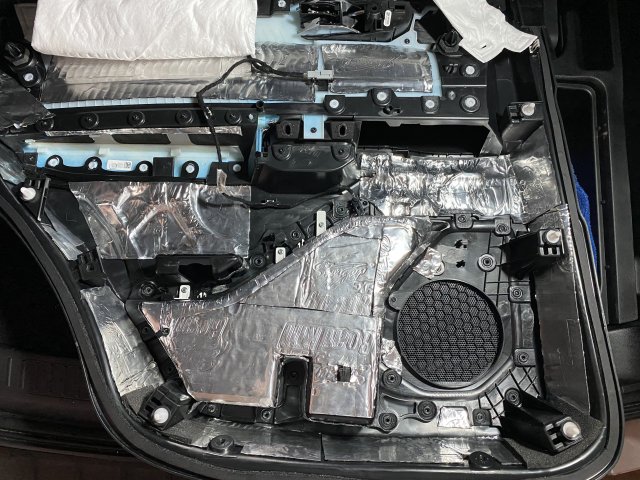
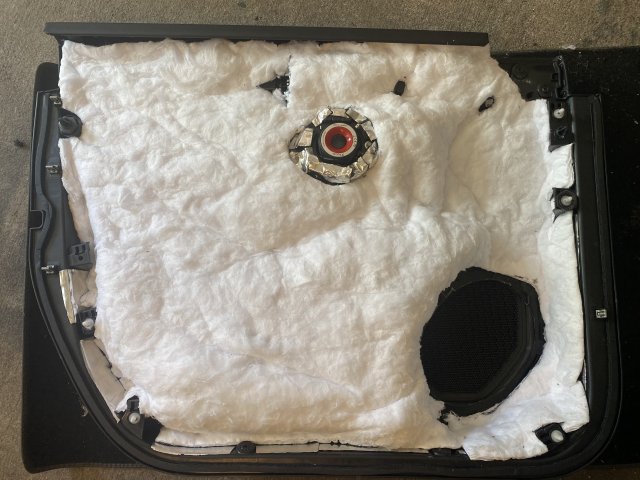
Doors were next. Fully gutted, 100% CLD on inner and outer skins as well as where possible on interior panels. 1/4” CCF, butyl and Tessa tape was used on everything that could present a rattle or vibration.
FA6F235B-4160-4682-A2E0-B129682446CC.jpeg 594A6EC2-ADB1-4BB9-BF6B-7206E975BAA1.jpeg 5053E5CA-CD8F-4961-8CB1-BC5E0E075728.jpeg EECF950D-5CB6-4224-BDA9-6B24BF4168CD.jpeg 7B2D419E-F6D8-451B-8C14-430E8BCB60C4.jpeg 216282D5-3F0D-437A-A7A0-5DB32946E3F2.jpeg A4943863-341E-4FE8-8FD9-833F0FBC93F8.jpeg 4A22B238-9F11-43B7-9CB3-646E5391F3C8.jpeg 30B3981B-48CE-4E38-9A68-A10304C8081B.jpeg
 

OP
UNBROKEN

UNBROKEN

4000 Post Club
Messages
4,572
Reactions
5,346
Points
352
Location
Houston, TX, USA
Thread Starter #3
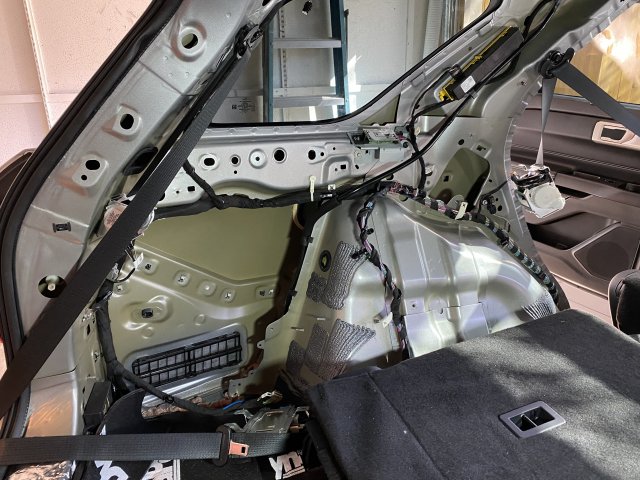
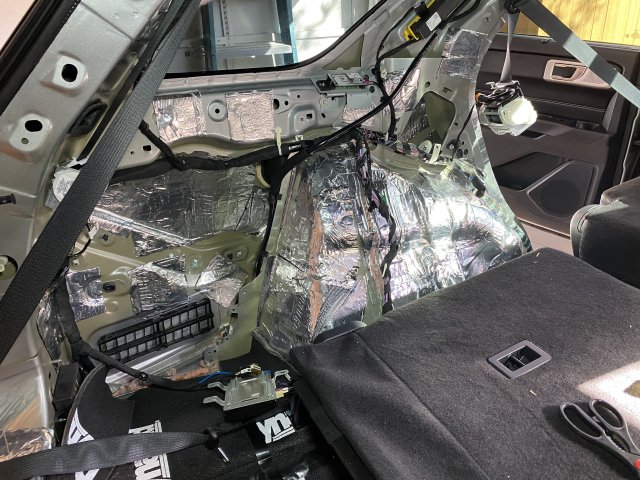
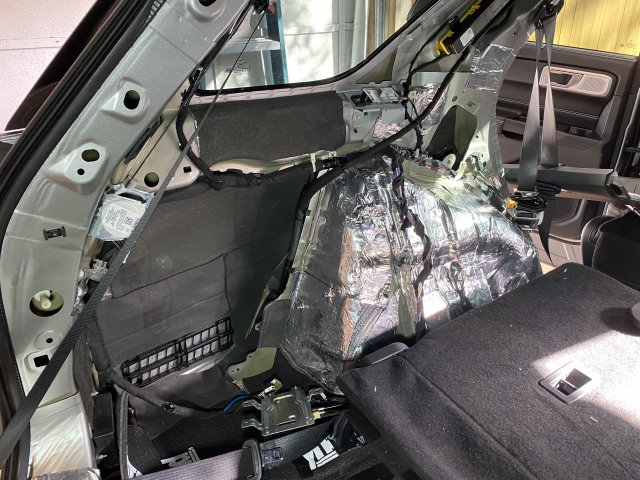
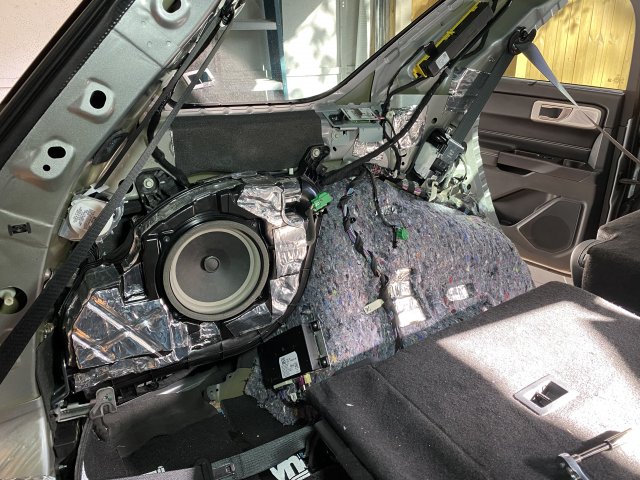
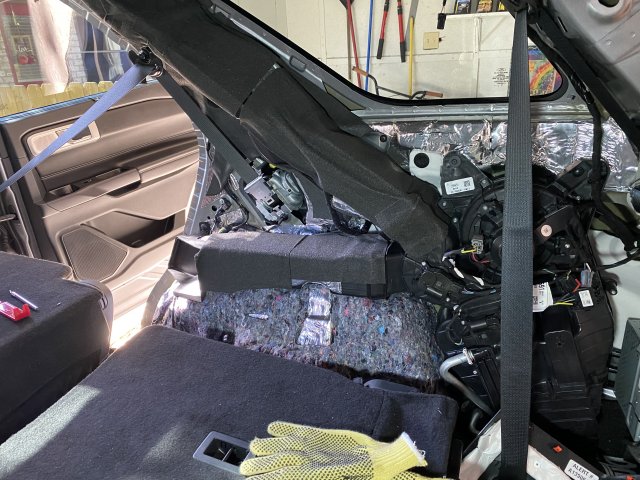
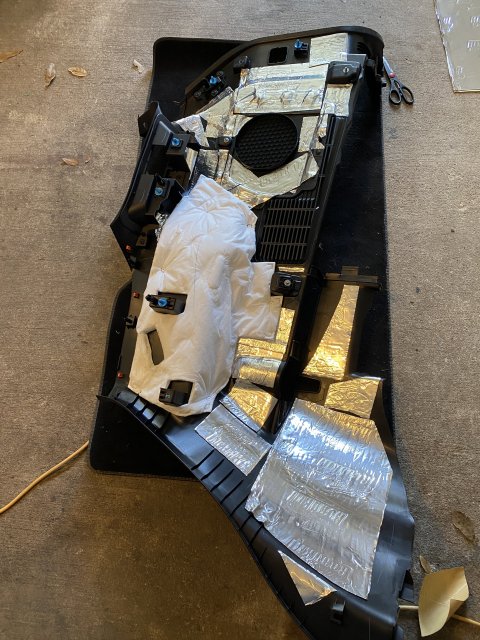
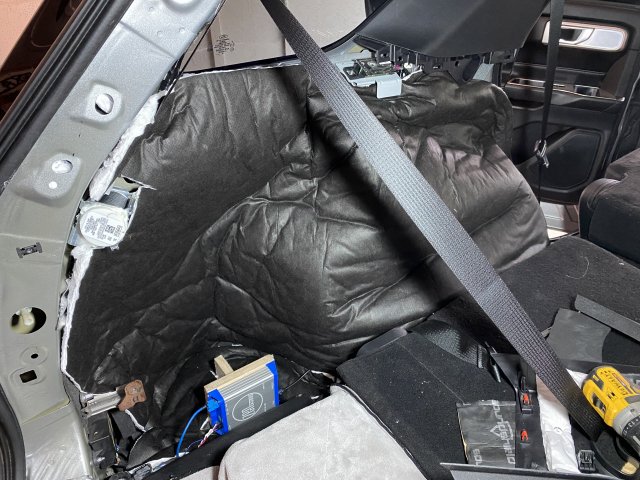
Last area so far was the rear panels from the b-pillars back. There’s a lot of stuff under there that had to be removed for access to the outer skin. CLD was used to add mass to the rear ac ducting then they were wrapped with 1/8” CCF. 1/4” CCF was used everywhere possible along with Tessa tape. I didn’t do 100% CLD coverage here...didn’t think it was necessary but I did hit the inner fender wells pretty good. Inner panels got the same CLD treatment. This is where I’m stopped for now. I also added CLD to the oem sub enclosure to add some mass...that thing rings like a tin can when you tap on it.
56E39383-8BE3-4D69-BC04-29B9FB51B445.jpeg 3CA1CEA0-3C5A-4B84-9E53-C5B89D8F3255.jpeg C712909A-F69D-4ADC-9647-A89CEAFDEEAC.jpeg 33F00E62-BF70-4C36-B74B-E372ECDCCCA0.jpeg A8743E7C-115D-4A4E-BB1F-DA920F59DA51.jpeg 5540131D-52EE-464C-ABE8-B06C60507EB7.jpeg
 

zdubyadubya

Active Member
Messages
813
Reactions
636
Points
232
Location
Utah
Vehicle
2020 ST
#4
of all your projects thusfar, THIS is the one that I am most interested in. I just wish I had the time to undertake such an ordeal. I also thought the general rule of thumb for CLD was like 25% coverage. Are you doing 100% because you intend this to be a competition car or do you recommend full coverage no matter what?

If I was to have an installer do this for me, a) how do i find a reputable place to do it--like what should i look for, and b) what do you think the ballpark cost would be, both parts and labor?

Also, do you mind posting links to your supplies? I think I'm going to prioritize doing something like this over some other stuff I had planned.

If you don't mind posting some opinions and thoughts and strategy to your process that would be awesome. I'm sure others on here would love to learn more about this. The pics are dope but did you have any strategy for coverage and material selection ahead of time?
 

OP
UNBROKEN

UNBROKEN

4000 Post Club
Messages
4,572
Reactions
5,346
Points
352
Location
Houston, TX, USA
Thread Starter #5
There’s definitely a point of diminishing returns on CLD coverage but I bought 4 bulk packs and I’m also a little old school and overkill never hurt anything. It’s all personal preference.
Having it done in a shop...I can’t imagine what that would cost. I have about $800 in materials...figure a shop hourly rate at $100ish an hour and it would get real expensive real fast.
I don’t have any links but a quick search on eBay will turn up everything listed for decent prices. Sonic Electronix is also a great source.
I could write up my thoughts but Nick did a much better job here in this link. It’s basically all the standard tricks for a full on deadening project and the reasoning behind them. It’s a good read.

https://resonixsoundsolutions.com/reference-information/
 

zdubyadubya

Active Member
Messages
813
Reactions
636
Points
232
Location
Utah
Vehicle
2020 ST
#6
Did you do your roof when you had the headliner down for the roof rail removal? I didn't see any signs in the pics that were posted. Are you saving that for a later date or did Ford do a pretty good job?

Also, I would be super curious to see if you A/C works better this coming summer. You have basically added a massive insulation layer to the entire vehicle.
 

Messages
52
Reactions
19
Points
7
Location
Virginia
#7
Figured I’d put this all in one place in case people wanna see what’s behind the interior panels.
My audio system gear is evolving...trying to keep cost reasonable but still play in the high end of things. Right now the plan is:
Nav TV Zen A2B interface
Helix DSP Pro with Director controller
Mosconi Pro 5/30 and Pro 4/30 amps.
Audio Frog 3 way front with GB60, GB25 and GB10 speakers.
Illusion Audio Carbon C12XL sub
That’s all subject to change depending on my mood at the time.
I do all of my own installs so I’ve been working on the sound deadening since it’s so time and labor intensive. I have about 30 hours in it so far and still have to do the floor.
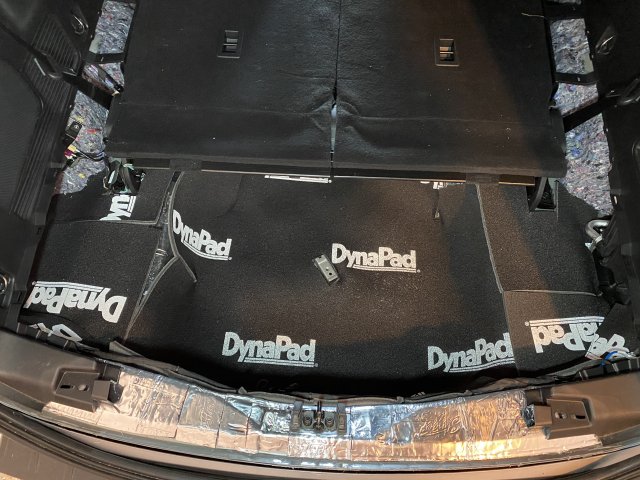
Products used are Stinger Roadkill Expert CLD, Dynamat DynaPad CCF/MLV combo and DynaLiner CCF in various thicknesses. I’ve also used a ton of butyl rope and Tessa tape for decoupling various wires, sunroof drain tubes, door crash bars, etc.
I started with the rear floor and hatch. 100% CLD and CCF/MLV combo to target road and exhaust noise. The laps weren’t taped yet in this pic of the Dynapad. View attachment 3501 View attachment 3502 View attachment 3503 View attachment 3504
So your setup in the front - you're replacing the center dash speakers, the lower door speakers, and the tweeters. Isn't there another speaker in the middle of the front doors?
 

OP
UNBROKEN

UNBROKEN

4000 Post Club
Messages
4,572
Reactions
5,346
Points
352
Location
Houston, TX, USA
Thread Starter #8
So your setup in the front - you're replacing the center dash speakers, the lower door speakers, and the tweeters. Isn't there another speaker in the middle of the front doors?
I’ll be running a 3-way active front plus sub. No center channel and no rear fill.
 

Messages
52
Reactions
19
Points
7
Location
Virginia
#9
I’ll be running a 3-way active front plus sub. No center channel and no rear fill.
So you’ll be replacing the 3 way component speakers in the 2 front doors, and the subwoofer...and then running the factory speakers in the center dash and back?

Sorry if these are remedial questions, I am still very much on the uptake with aftermarket audio


Sent from my iPhone using Tapatalk
 

OP
UNBROKEN

UNBROKEN

4000 Post Club
Messages
4,572
Reactions
5,346
Points
352
Location
Houston, TX, USA
Thread Starter #10
No...I’ll only be running a total of 7 speakers. This will be a SQ competition system....all this 19 speaker crap is just that...crap.
 

Messages
52
Reactions
19
Points
7
Location
Virginia
#11
No...I’ll only be running a total of 7 speakers. This will be a SQ competition system....all this 19 speaker crap is just that...crap.
Gotttcha. So for someone like me who’s looking for general upgrade - would you suggest something similar?

NavTV audio interface...3 way component in the front and subwoofer?


Sent from my iPhone using Tapatalk
 

OP
UNBROKEN

UNBROKEN

4000 Post Club
Messages
4,572
Reactions
5,346
Points
352
Location
Houston, TX, USA
Thread Starter #12
It can be done cheaper...there are less expensive interfaces. It’s all budget driven. I’ll be at $12-13k in gear plus install supplies. I wouldn’t recommend that. lol
 

Messages
52
Reactions
19
Points
7
Location
Virginia
#13
It can be done cheaper...there are less expensive interfaces. It’s all budget driven. I’ll be at $12-13k in gear plus install supplies. I wouldn’t recommend that. lol
Damn! I respect it! Thanks!


Sent from my iPhone using Tapatalk
 

Messages
52
Reactions
19
Points
7
Location
Virginia
#14
It can be done cheaper...there are less expensive interfaces. It’s all budget driven. I’ll be at $12-13k in gear plus install supplies. I wouldn’t recommend that. lol
The problem is I know myself - I’ll walk into a shop and end up spending $12k when all is said and done. I have no self control when it comes to audio


Sent from my iPhone using Tapatalk
 

Messages
133
Reactions
106
Points
37
Location
Lehigh Valley, PA
#15
[mention]UNBROKEN [/mention] I really appreciate you posting this man. I’ve never done sound insulation like this before but I’ll be much more confident with this post. For me I will be most interested in mitigating the shakes and rattles from my front doors.


Sent from my iPhone using Tapatalk
 

wycsailor

New Member
Messages
9
Reactions
5
Points
2
Location
Minneapolis, MN, USA
#16
Wow, awesome work. Thanks for sharing the pics. Super-helpful for when I do my doors.
 

Messages
28
Reactions
6
Points
2
Location
Chattanooga, TN
Vehicle
2022 ST
#17
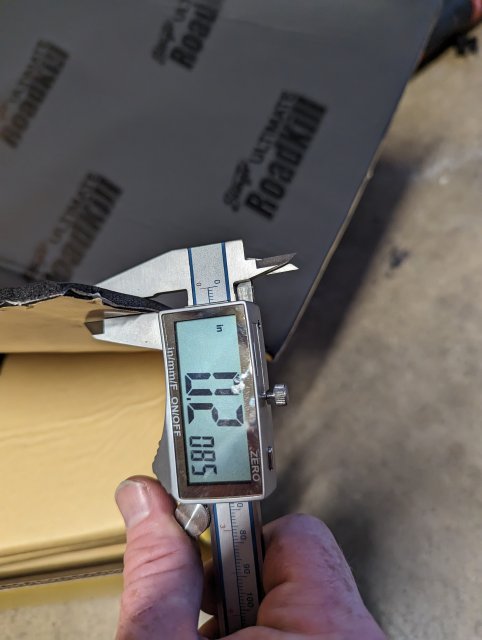
Bet those doors sound like a S class now when you close them. @UNBROKEN have you tested Roadkill Ultimate yet? Just picked up a box to start on the hatch area, it's basically Roadkill with Overkill already attached if you aren't familiar.
 

OP
UNBROKEN

UNBROKEN

4000 Post Club
Messages
4,572
Reactions
5,346
Points
352
Location
Houston, TX, USA
Thread Starter #18
Bet those doors sound like a S class now when you close them. @UNBROKEN have you tested Roadkill Ultimate yet? Just picked up a box to start on the hatch area, it's basically Roadkill with Overkill already attached if you aren't familiar.
I haven’t used that. I’ve done a LOT more sound treatments since this thread, I just forgot to keep the thread current.
 

Messages
28
Reactions
6
Points
2
Location
Chattanooga, TN
Vehicle
2022 ST
#19
I haven’t used that. I’ve done a LOT more sound treatments since this thread, I just forgot to keep the thread current.
I'm not sure it'll be as effective as doing it in two layers but I wanted to try it. PXL_20230913_233321717.jpg Have you tried using thinsulate (or similar) in the interior cavities with your additional sound treatments?
 

OP
UNBROKEN

UNBROKEN

4000 Post Club
Messages
4,572
Reactions
5,346
Points
352
Location
Houston, TX, USA
Thread Starter #20
That Stinger stuff is like several other CLD/CCF combos. They work great for what they are.
My whole car is lined with Thinsulate now…it’s everywhere it can possibly be. Examples here: IMG_7588.jpeg IMG_7591.jpeg


Top