Thread Starter
#881
-
Sign Up! To view all forums and unlock additional cool features
Welcome to the #1 Explorer ST Forum and Explorer ST community dedicated to Explorer ST owners and enthusiasts. Register for an account, it's free and it's easy, so don't hesitate to join the Explorer ST Forum today!
UNBROKEN’s Iconic Silver ST build
- Thread starter UNBROKEN
- Start date
Thread Starter
#882
Thread Starter
#883
Thread Starter
#883
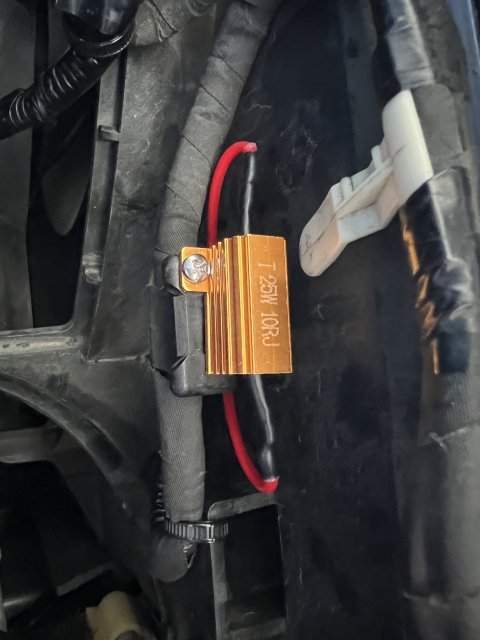
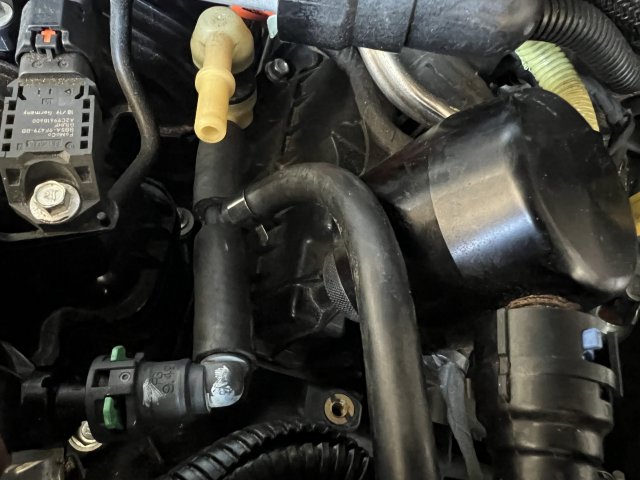
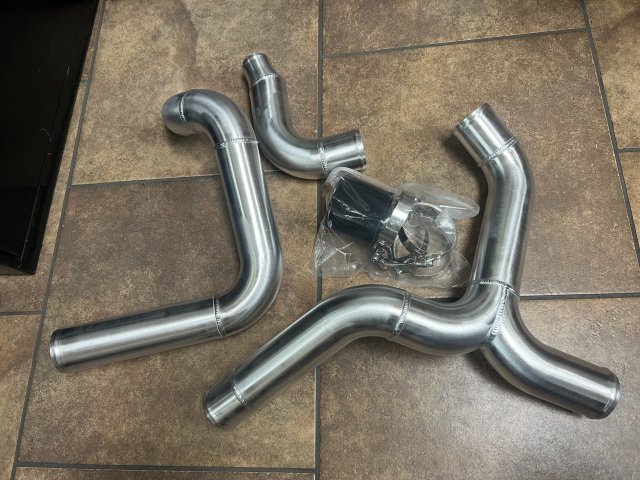
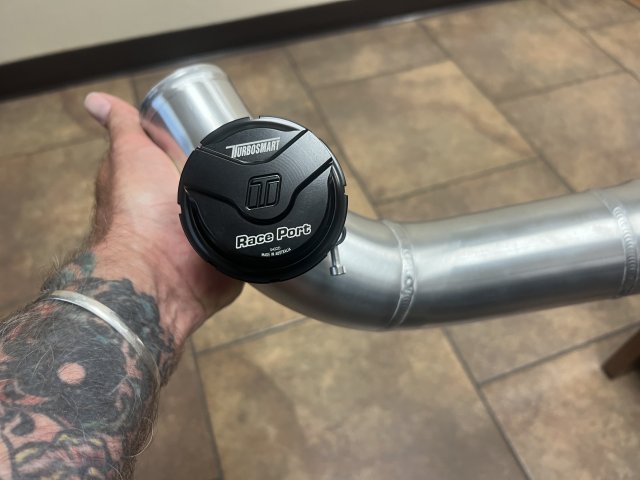
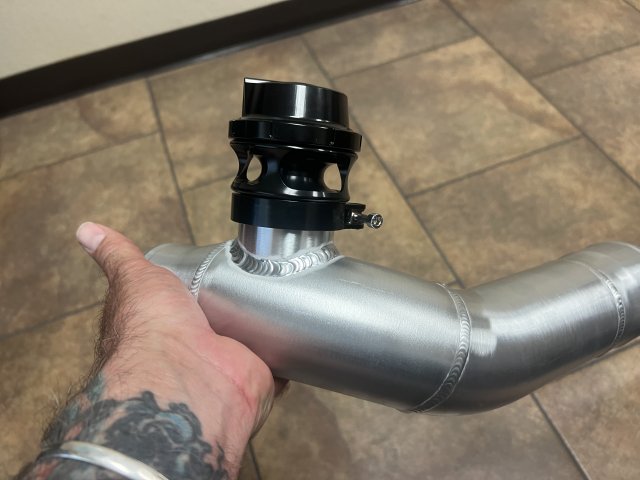
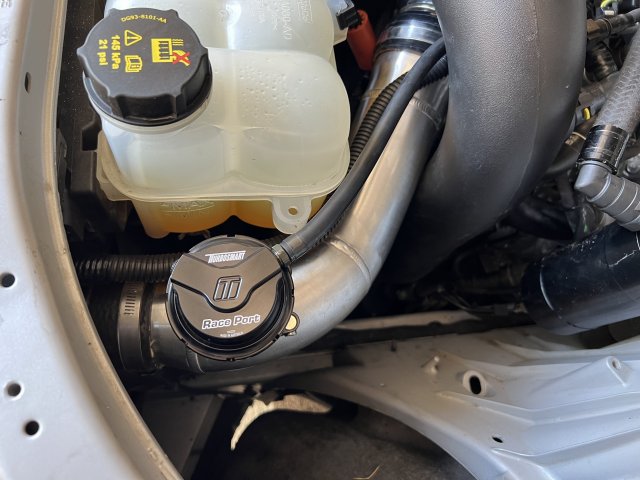 Swapped from the TS Kompact Dual Port in the oem spot to the Race Port in the FenFab charge pipe. Simple install with the block off plate and rubber plug for the oem location. I cut the stock plug off and hard wired the resistor then mounted it to the radiator shroud. Cut out and reused the stock connector for the vacuum connection and routed the hose as out of the way as I could. All in all a damn good fit.
Found out the hot side piping won’t work with the AFe intake…that’s going back to Brett and he’s gonna come up with a kit that will work.
-
2
- Show All
View attachment 14471
View attachment 14472
View attachment 14473
Swapped from the TS Kompact Dual Port in the oem spot to the Race Port in the FenFab charge pipe. Simple install with the block off plate and rubber plug for the oem location. I cut the stock plug off and hard wired the resistor then mounted it to the radiator shroud. Cut out and reused the stock connector for the vacuum connection and routed the hose as out of the way as I could. All in all a damn good fit.
Found out the hot side piping won’t work with the AFe intake…that’s going back to Brett and he’s gonna come up with a kit that will work.
Found out the hot side piping won’t work with the AFe intake…that’s going back to Brett and he’s gonna come up with a kit that will work.
Thread Starter
#885
Thread Starter
#885
i have the exact same kit and the AFE intake, i got mines to fit by slightly clocking the pipe so the BOV would be tilted twards the driver side wheel-well. Its a tight squeeze but it clears, keep us updated on it, if a solution becomes available i might send mines back to Brett... just for added clearance.
Thread Starter
#886
Thread Starter
#886
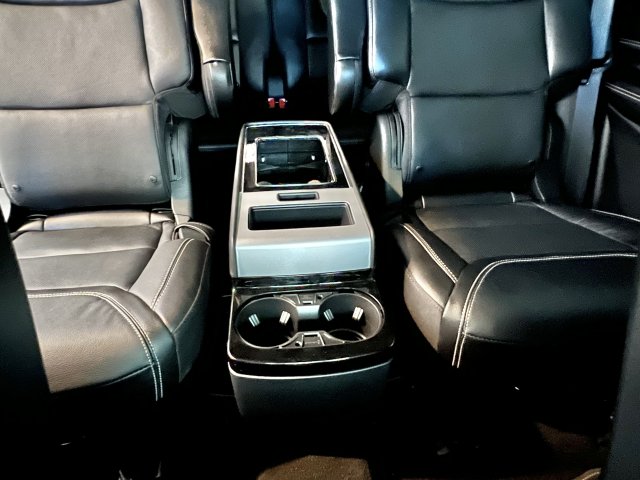
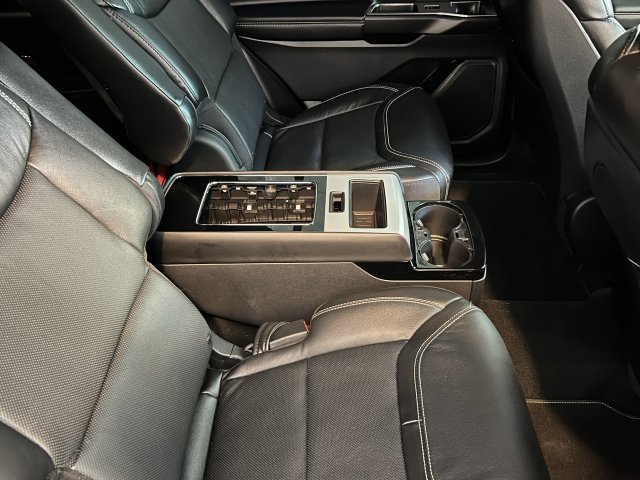
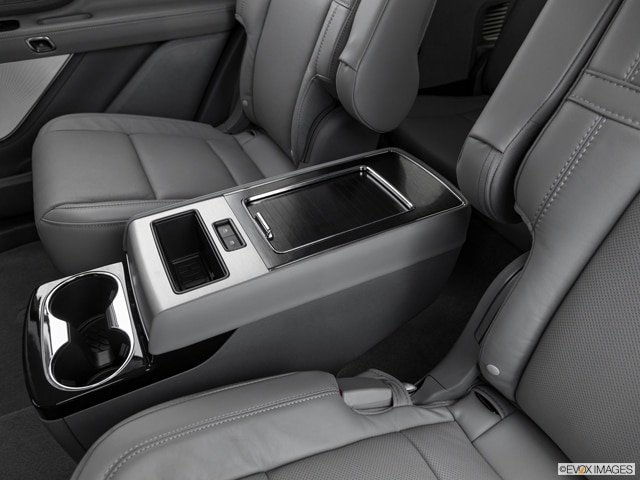
After about a year of backordered parts the last piece is supposed to ship on 11/4 so I can FINALLY build my Aviator rear console. I’ve been dying to get this done but have been held up by the main compartment that everything builds off of. It’s not cheap…close to $2200 for the 19 individual parts plus clips, screws and bolts but to me it’s well worth it.

-
16
- Show All
After about a year of backordered parts the last piece is supposed to ship on 11/4 so I can FINALLY build my Aviator rear console. I’ve been dying to get this done but have been held up by the main compartment that everything builds off of. It’s not cheap…close to $2200 for the 19 individual parts plus clips, screws and bolts but to me it’s well worth it.
View attachment 14657
Sent from my iPhone using Tapatalk
-
1
- Show All
After about a year of backordered parts the last piece is supposed to ship on 11/4 so I can FINALLY build my Aviator rear console. I’ve been dying to get this done but have been held up by the main compartment that everything builds off of. It’s not cheap…close to $2200 for the 19 individual parts plus clips, screws and bolts but to me it’s well worth it.
View attachment 14657
Apparently they control the sunroof shade in the Aviator. I figure I’ll stick some USB ports or something there instead.
-
1
- Show All
Thread Starter
#892
Thread Starter
#897
Thread Starter
#897
Can you give some type instructions or pointers on dropping the headliner? I'm about to do my roof rack delete and can't find much information on removing it
Thread Starter
#898
Thread Starter
#898
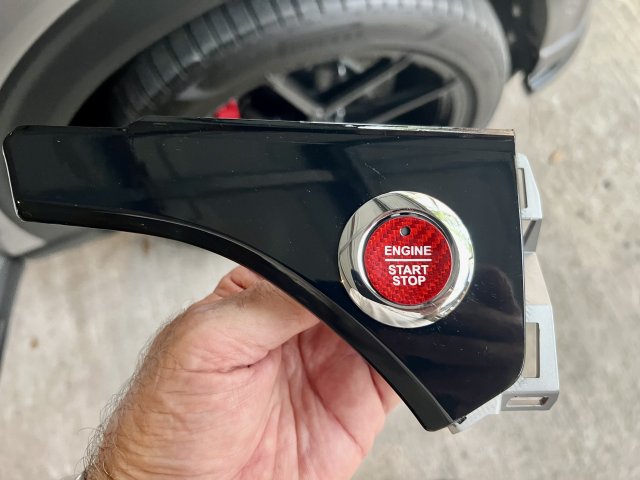
Sometimes new mods present new problems. My Aviator rear console has piano black trim on it but my radio bezel is matte black. So…I ordered the piano black radio bezel to make it match. Problem solved…except I’ve never liked the fake carbon fiber dash trim…so I ordered a full set that’s smooth and a roll of Vvivid piano black vinyl wrap.
Here’s a sneak peek until the bezel shows up Monday and I can finish it.
Here’s a sneak peek until the bezel shows up Monday and I can finish it.

-
3
- Show All
Sometimes new mods present new problems. My Aviator rear console has piano black trim on it but my radio bezel is matte black. So…I ordered the piano black radio bezel to make it match. Problem solved…except I’ve never liked the fake carbon fiber dash trim…so I ordered a full set that’s smooth and a roll of Vvivid piano black vinyl wrap.
Here’s a sneak peek until the bezel shows up Monday and I can finish it.
View attachment 15022
Here’s a sneak peek until the bezel shows up Monday and I can finish it.
View attachment 15022
Explorer ST Posts
-
-
-
-
-
-
Considering 2025 ST but concerned with reliability
- Latest: poordudedrivingaford
-
-
-

