
I believe this may be my first post where I can offer something rather than take information.
Thanks to the guys who have done this swap before me and a shout-out to Chad Murphy.
I have hated the 10" vertical since I connected my phone and realized what Ford had failed to do. That was about day two of ownership.
When this mod was performed by others it was a must-have for myself.
Chad hooked me up with a non-working screen so I could begin fabrication and await the new working unit from him. The photos are of the non-working.
Once I had it perfected as I wanted it I duplicated the brackets, Countersunk the bottom bolts assembled it and my ST was borrowed by my son until this coming Wed. I'll be able to follow up with final install photos of the back covers then.
I loved the other installs but I wanted that 53-dollar rubber mat to be more useable than what it appeared to be in other installs. I also wanted to simplify this for others to duplicate as well as I didn't want to cut half of my perfectly good $90 trim bezel.
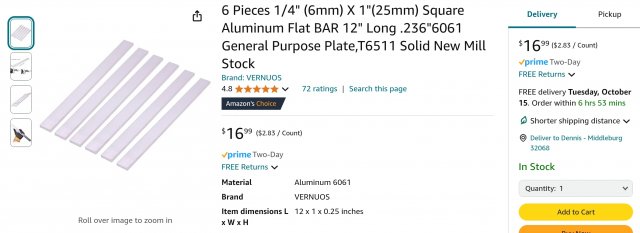
I bought aluminum from Amazon, The pack I bought gave me plenty of material for experimenting. Once finished I realized this can be completed using 1 12 " piece. - $17.00
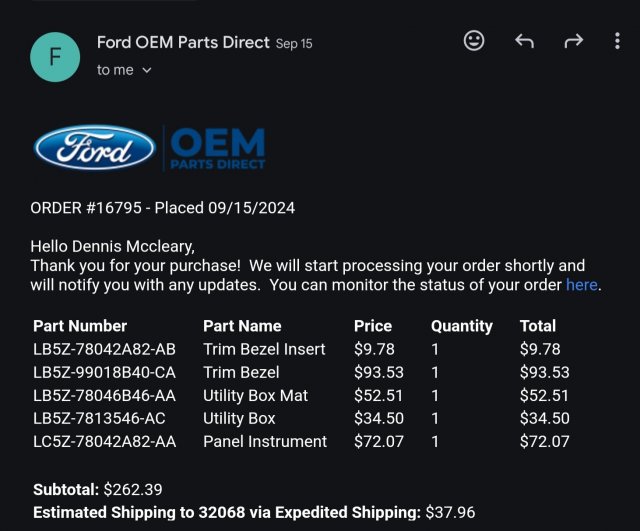
I purchased all of my OEM parts from Ford OEM Parts Direct. It took them several weeks to fulfill the order. I paid for expedited shipping and shouldn't have but I didn't realize they didn't have everything I wanted in stock. It was still cheaper than my local dealer. $300 with expedited shipping.
All of the hardware was from the Depot. Less than 20 dollars.
I believe the screens vary some with availability so that would be on your own source. If Chad has any I believe he's very fair.
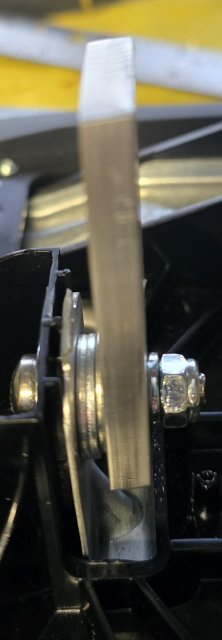
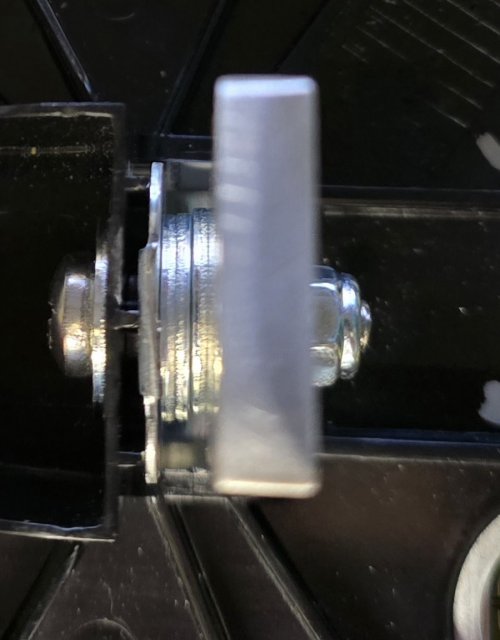
My design is different than the other I've seen. I use all M6-1.0 stainless bolts. This is the same size as the bolts that Ford uses to mount the display. I only went with stainless because of availability. I also use a washer stack as a spacer to raise the screen .600. This allows more room
in the compartment below the display. This measurement also allows the bottom mount connections to be used very easily.
The bottom bracket stack uses 1 nut (non-locking) on each side as a spacer for the attached links. This matches the bottom of the dash mounting points perfectly.
The top attach link goes on top of the dash mounting point while the two lower attach links mount on the bottom of the dash mounting points.
The top attach link is connected to the dash mount using the OEM bolt going from top to bottom, just as it came from the factory.
The two bottom attach links are connected to the dash mount with the OEM bolts inserted from the bottom and traveling through the attach link and into the stock mount.
As an alternative, these same two links could be connected by using a M6-1.0mm x 35 mm bolt from the top so long as you placed a washer and lock nut on the bottom.
A M6 bolt has a .236 diameter. I reamed all of my holes to .246 with a .284 edge distance. Mine fits with a tight tolerance.
You can duplicate this with a 1/4 drill and be successful.
The plastic trim bezel still has to be cut for the insertion of the top attach link and notched on the bottom in two spots for the lower attach links but remains 90% intact.
I can easily use the compartment now.
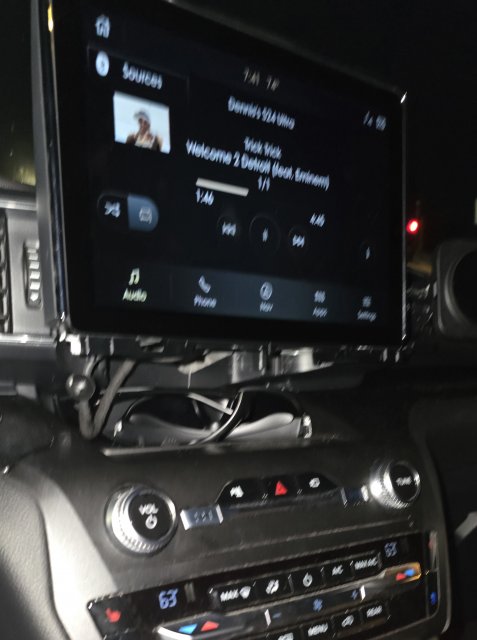
My final product is installed and it will be several days before I can get more pics. The one photo of the display installed shows the opening. Noting under shows while sitting in the vehicle. The wire was tucked and secured after photo.
I am getting a lower bezel 3D printed and I am covering the opening with pleather this weekend so nothing will be viewable from any position.


Thanks to the guys who have done this swap before me and a shout-out to Chad Murphy.
I have hated the 10" vertical since I connected my phone and realized what Ford had failed to do. That was about day two of ownership.
When this mod was performed by others it was a must-have for myself.
Chad hooked me up with a non-working screen so I could begin fabrication and await the new working unit from him. The photos are of the non-working.
Once I had it perfected as I wanted it I duplicated the brackets, Countersunk the bottom bolts assembled it and my ST was borrowed by my son until this coming Wed. I'll be able to follow up with final install photos of the back covers then.
I loved the other installs but I wanted that 53-dollar rubber mat to be more useable than what it appeared to be in other installs. I also wanted to simplify this for others to duplicate as well as I didn't want to cut half of my perfectly good $90 trim bezel.
I bought aluminum from Amazon, The pack I bought gave me plenty of material for experimenting. Once finished I realized this can be completed using 1 12 " piece. - $17.00
I purchased all of my OEM parts from Ford OEM Parts Direct. It took them several weeks to fulfill the order. I paid for expedited shipping and shouldn't have but I didn't realize they didn't have everything I wanted in stock. It was still cheaper than my local dealer. $300 with expedited shipping.
All of the hardware was from the Depot. Less than 20 dollars.
I believe the screens vary some with availability so that would be on your own source. If Chad has any I believe he's very fair.
My design is different than the other I've seen. I use all M6-1.0 stainless bolts. This is the same size as the bolts that Ford uses to mount the display. I only went with stainless because of availability. I also use a washer stack as a spacer to raise the screen .600. This allows more room
in the compartment below the display. This measurement also allows the bottom mount connections to be used very easily.
The bottom bracket stack uses 1 nut (non-locking) on each side as a spacer for the attached links. This matches the bottom of the dash mounting points perfectly.
The top attach link goes on top of the dash mounting point while the two lower attach links mount on the bottom of the dash mounting points.
The top attach link is connected to the dash mount using the OEM bolt going from top to bottom, just as it came from the factory.
The two bottom attach links are connected to the dash mount with the OEM bolts inserted from the bottom and traveling through the attach link and into the stock mount.
As an alternative, these same two links could be connected by using a M6-1.0mm x 35 mm bolt from the top so long as you placed a washer and lock nut on the bottom.
A M6 bolt has a .236 diameter. I reamed all of my holes to .246 with a .284 edge distance. Mine fits with a tight tolerance.
You can duplicate this with a 1/4 drill and be successful.
The plastic trim bezel still has to be cut for the insertion of the top attach link and notched on the bottom in two spots for the lower attach links but remains 90% intact.
I can easily use the compartment now.
My final product is installed and it will be several days before I can get more pics. The one photo of the display installed shows the opening. Noting under shows while sitting in the vehicle. The wire was tucked and secured after photo.
I am getting a lower bezel 3D printed and I am covering the opening with pleather this weekend so nothing will be viewable from any position.
-
 1
1
- Show All