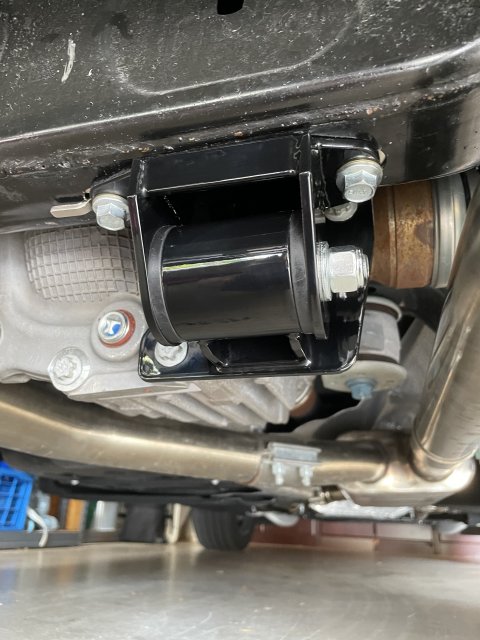
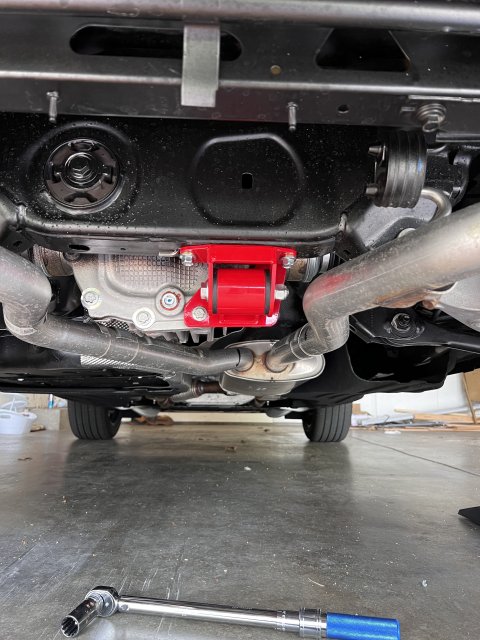
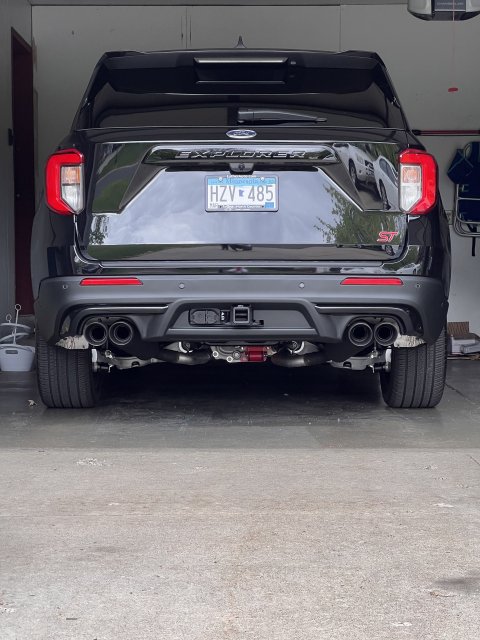
-
Sign Up! To view all forums and unlock additional cool features
Welcome to the #1 Explorer ST Forum and Explorer ST community dedicated to Explorer ST owners and enthusiasts. Register for an account, it's free and it's easy, so don't hesitate to join the Explorer ST Forum today!
NEW Product Alert! The AWR Racing rear diff mount
- Thread starter ron@whooshmotorsports
- Start date
probably twice the size and weight I was expecting and quality built that’s for sure
-
1
- Show All
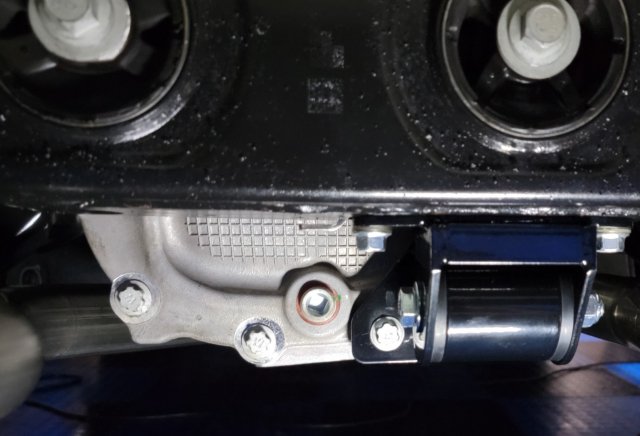
Installed. Couple things that may help. E18 wrench as others suggested. If you have the 4-bolt set up, go in from the passenger's side and slide the base plate over to the driver's side it sets in place the correct way but if you go in from the driver's side the 2nd bolt gets in your way. Watch AWR install video and you will see it pass the opening on the passenger's side; it will make sense when you see it.
I mounted the plate to the differential first. It gives you more room to navigate the 3 o'clock bolt. When installing that 3 o'clock bolt look for a small notch in the subframe. If you line it up right it goes right in, I fought with it and thought no way until I used that notch, popped right in.
The rest is straight forward (sorry no video) but just take your time. Tighten/torque everything down and you're done.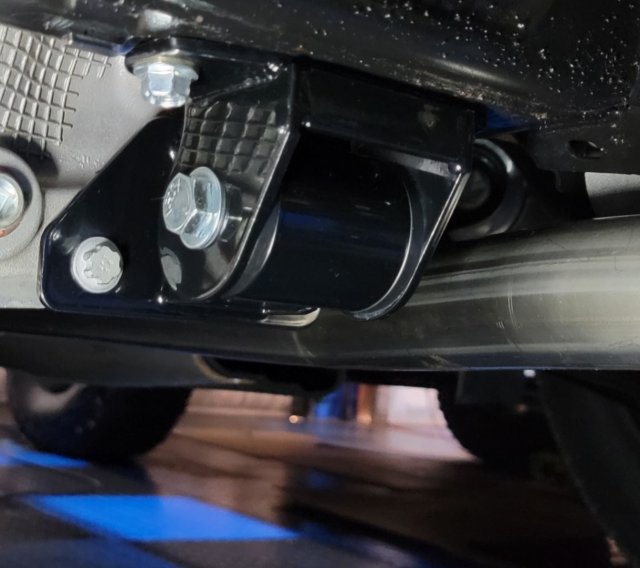


-
6
- Show All
Installed. Couple things that may help. E18 wrench as others suggested. If you have the 4-bolt set up, go in from the passenger's side and slide the base plate over to the driver's side it sets in place the correct way but if you go in from the driver's side the 2nd bolt gets in your way. Watch AWR install video and you will see it pass the opening on the passenger's side; it will make sense when you see it.
I mounted the plate to the differential first. It gives you more room to navigate the 3 o'clock bolt. When installing that 3 o'clock bolt look for a small notch in the subframe. If you line it up right it goes right in, I fought with it and thought no way until I used that notch, popped right in.
The rest is straight forward (sorry no video) but just take your time. Tighten/torque everything down and you're done. View attachment 12323 View attachment 12324
-
1
- Show All
- Messages
- 42
- Reactions
- 27
- Points
- 2
- Location
- Stratford, ON, Canada
- Vehicle
- 2022 Explorer ST Star White
So far proving to be the most frustrating thing I could imagine with that 3 o’clock bolt just dont see how it’s going back in even with that notch
anyone installed this on a 2022? After 2 hours of messing with it I just dont see it going in
as mentioned below pushing the bracket up and letting it come down with the bolt at the same time works, not sure if the borla exhaust make this much harder than it need to be or not but missing a knucle and a couple hours later... its in lol
Last edited:
Thread Starter
#72
Thread Starter
#72
Installed. Couple things that may help. E18 wrench as others suggested. If you have the 4-bolt set up, go in from the passenger's side and slide the base plate over to the driver's side it sets in place the correct way but if you go in from the driver's side the 2nd bolt gets in your way. Watch AWR install video and you will see it pass the opening on the passenger's side; it will make sense when you see it.
I mounted the plate to the differential first. It gives you more room to navigate the 3 o'clock bolt. When installing that 3 o'clock bolt look for a small notch in the subframe. If you line it up right it goes right in, I fought with it and thought no way until I used that notch, popped right in.
The rest is straight forward (sorry no video) but just take your time. Tighten/torque everything down and you're done. View attachment 12323 View attachment 12324
I mounted the plate to the differential first. It gives you more room to navigate the 3 o'clock bolt. When installing that 3 o'clock bolt look for a small notch in the subframe. If you line it up right it goes right in, I fought with it and thought no way until I used that notch, popped right in.
The rest is straight forward (sorry no video) but just take your time. Tighten/torque everything down and you're done. View attachment 12323 View attachment 12324
same color on our 2021 ST!
-
1
- Show All
Installed! For the 3 O'clock bolt first put thru the brace then push bolt upwards till it passes a ridge then it will slip in as you pull it down toward the ground. I did as Ricky did and loosely mounted the diff plate first. If you follow this method you need to wiggle the bushing housing a bit to get the threads started on that. Once all bolts are treaded I just took a big screwdriver and aligned the holes for the thru bolt into the bushing and it slid right in. Follow the tightening steps. 1. sub frame bolts to 40 ft/lbs. 2. diff bolts 33 Ft/lbs, Then main thru bolt 60-65 ft/lbs. You definitely need an E 18 ratcheting wrench to make it easy.. Amazon prime can't go wrong
https://www.amazon.com/GEARWRENCH-9...=1653162558&sprefix=E18+wratch,aps,137&sr=8-3
I think now I am fully prepped with whipple intercooler, diff brace, intake and exhaust for the ZFG tune.
I got the black so not to be as noticeable.
https://www.amazon.com/GEARWRENCH-9...=1653162558&sprefix=E18+wratch,aps,137&sr=8-3
I think now I am fully prepped with whipple intercooler, diff brace, intake and exhaust for the ZFG tune.
I got the black so not to be as noticeable.
Attachments
-
1.6 MB Views: 29
-
3
- Show All
So far proving to be the most frustrating thing I could imagine with that 3 o’clock bolt just dont see how it’s going back in even with that notch
anyone installed this on a 2022? After 2 hours of messing with it I just dont see it going in
anyone installed this on a 2022? After 2 hours of messing with it I just dont see it going in
-
1
- Show All
- Messages
- 42
- Reactions
- 27
- Points
- 2
- Location
- Stratford, ON, Canada
- Vehicle
- 2022 Explorer ST Star White
Installed! For the 3 O'clock bolt first put thru the brace then push bolt upwards till it passes a ridge then it will slip in as you pull it down toward the ground. I did as Ricky did and loosely mounted the diff plate first. If you follow this method you need to wiggle the bushing housing a bit to get the threads started on that. Once all bolts are treaded I just took a big screwdriver and aligned the holes for the thru bolt into the bushing and it slid right in. Follow the tightening steps. 1. sub frame bolts to 40 ft/lbs. 2. diff bolts 33 Ft/lbs, Then main thru bolt 60-65 ft/lbs. You definitely need an E 18 ratcheting wrench to make it easy.. Amazon prime can't go wrong
https://www.amazon.com/GEARWRENCH-9222-Double-Ratcheting-Wrench/dp/B000HBF5MA/ref=sr_1_3?crid=1ZZH8CQOUXLBY&keywords=e18+ratcheting+wrench&qid=1653162558&sprefix=E18+wratch,aps,137&sr=8-3
I think now I am fully prepped with whipple intercooler, diff brace, intake and exhaust for the ZFG tune.
I got the black so not to be as noticeable.
thats that helped, not sure if the borla exhaust makes this more difficult than it need to be with the pipe right there or if the factory exhaust is in the same location
Opened mine up today and like others have said, I was very impressed with the build quality. Install was a little frustrating, especially that 3 o clock bolt, but it's not difficult. Anybody could do it in their driveway. Now I'm curious how a 3 bolt w/ AWR brace compares to the strength of an OEM 4 bolt rear?
-
1
- Show All
Given the option with no other conditions (cost, labor, time, etc.) involved, I'd take the 4-bolt, hands down and if I had the DiffSupport sitting around I'd still put it on. I think this product is definitely worthy of consideration for those in my circumstance. If it's an either/or situation my head tells me the 4-bolt is the better option.
I guess I'd like to see this recall expanded to the point where Ford would replace the subframe, that ain't happening. I'd be delusional to think it would. Initially, I was going to just buy the subframe but once that recall happened there is a bit of lazy and a bit of wait-and-see in me.
I guess I'd like to see this recall expanded to the point where Ford would replace the subframe, that ain't happening. I'd be delusional to think it would. Initially, I was going to just buy the subframe but once that recall happened there is a bit of lazy and a bit of wait-and-see in me.
Last edited:
-
4
- Show All
Explorer ST Posts
-
-
-
-
What are the 2025 Prices people are paying?
- Latest: 2020FordRaptor
-
-
-
-
-

 sorry I couldn’t resist!