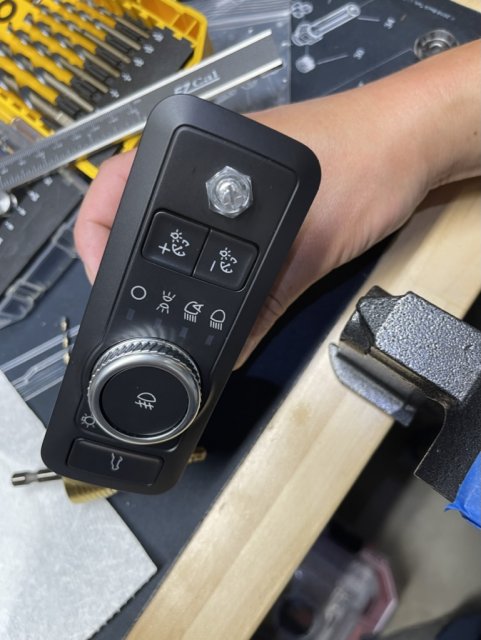
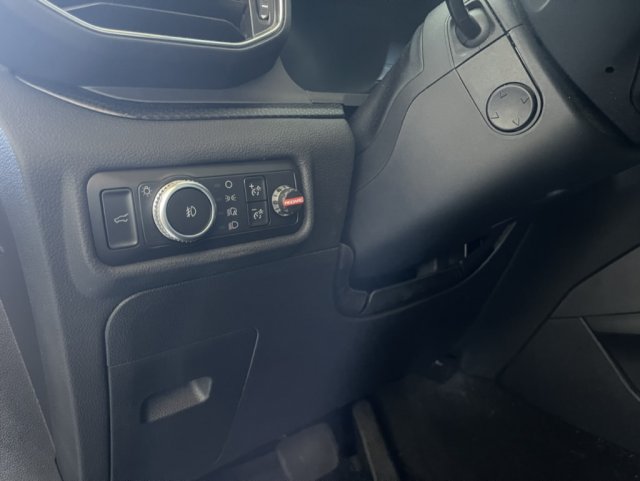
I installed a Redarc trailer brake controller the other day. And in researching, I found the explanations of where to find the plug in the car to be lacking (and ultimately incorrect). So I figured I'd make a post about it to help others in the future. I have a 2021 Explorer ST, I do not know if there are differences with other years.
The most common explanation of where to find the plug is "by your right knee" which was way off and would have led me to searching behind the center waterfall or by the column. I've also read that it was "taped to something" to hide it out of the way. I found both to be incorrect.
Finding the socket for the trailer brake control harness.
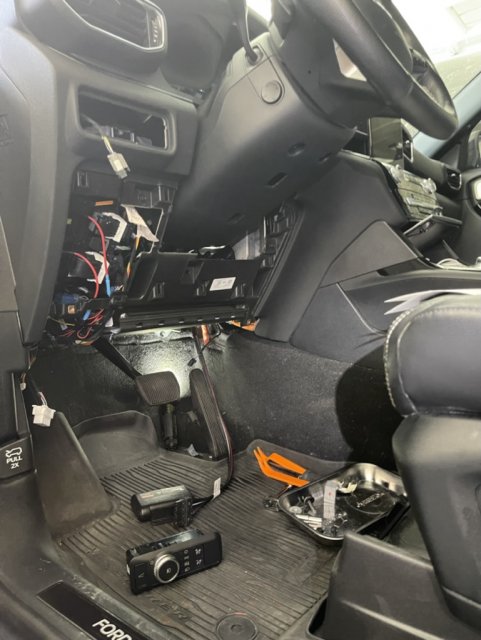
First step, remove the lower dash panel and the kick panel above the pedals. There is one visible 7mm bolt by the driver's knee, and another hidden behind the fuse panel cover. By the pedals there's a 10mm nut against the firewall and a 10mm bolt going towards the trans tunnel. Finally there's a christmas tree fastener right below where you removed the first bolt. Pop the lower dash panel free and work the kick panel out. There are two wires connected to the panels, one for a light above the pedals and the other for the OBD-II port.
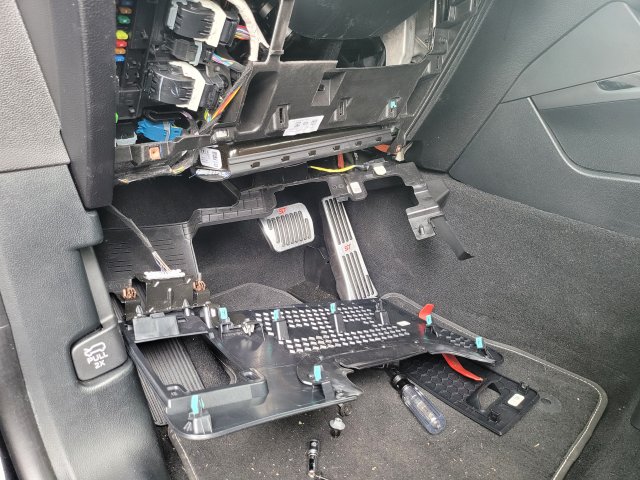
Disconnect the plug for the lamp, and use a flat screwdriver to release one of the tabs holding the OBD-II port into the bracket and it'll pop right out. Put the panel aside.
If you stick your head under there, or a mirror/camera, you'll find the plug for a trailer brake controller right above the brake pedal behind the knee air bag and floor vents.
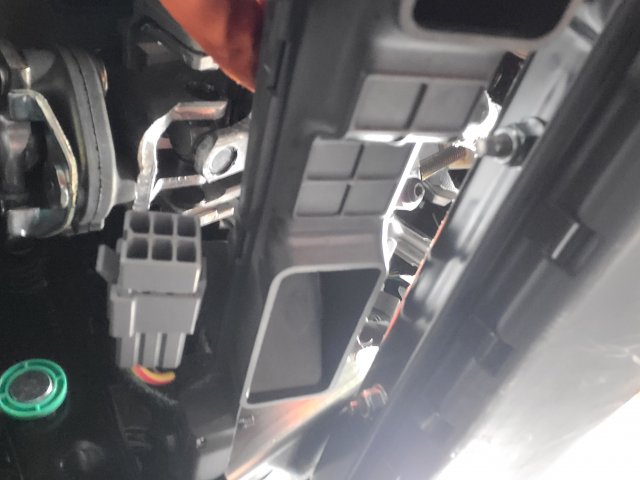
It's the big grey plug in the picture. It's mounted to a cross bar there, you don't need to remove it. You'll also see that there's a dummy plug in the socket. Push back the angled tab you see and pull out the dummy plug.
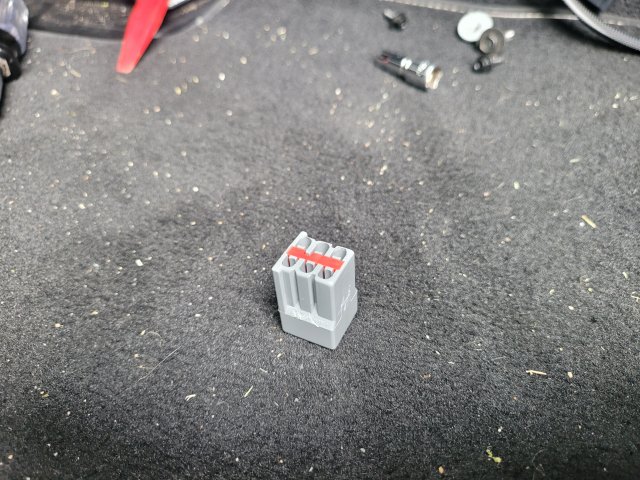
The dummy plug.
Now you can plug in your trailer brake controller harness and proceed with the install.
Installing the Redarc Tow-Pro (Liberty or Elite).
I went with the Liberty over the Elite because I don't plan to tow off-road, and the Liberty still allows me to manually trigger moderate braking to reduce sway if needed. But both versions are identical dimensionally so this install will work with either.
Plugged in the harness:
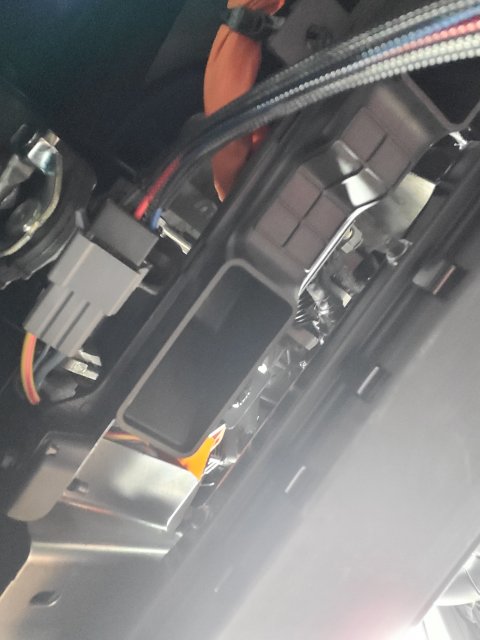
Secured to the column harness:
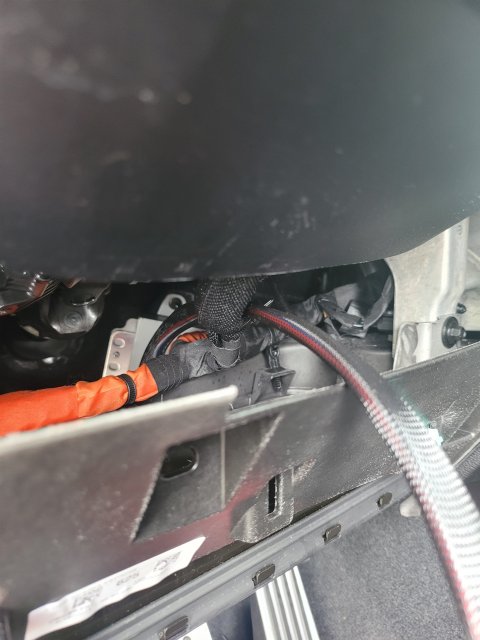
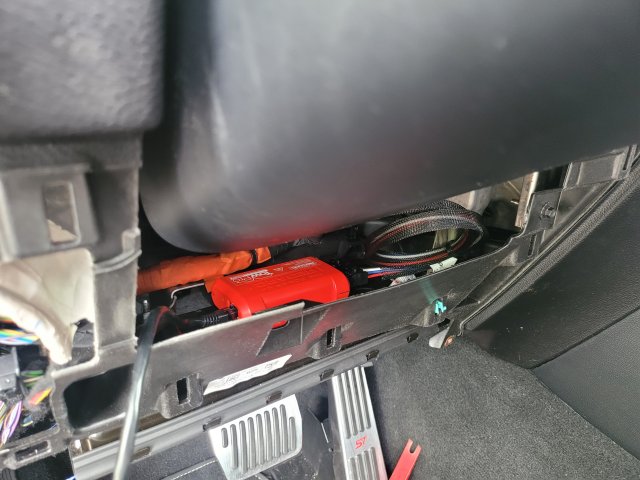
Then I coiled the excess, connected it to the Tow-Pro. I also connected the cable for the control knob and then mounted the Tow-Pro with 3M rivet tape to the top of the knee air bag. The bag expands from the bottom, so this won't interfere with deployment.
Now to mount the control knob. I got the idea of where to mount it from the Bronco forums. It looks like Ford offeres an accessory trailer brake controller for the Bronco that is just a rebranded Redarc Tow-Pro Elite. They mount the knob in with the headlight controls and it looks really good. So I decided to mount mine the same way.
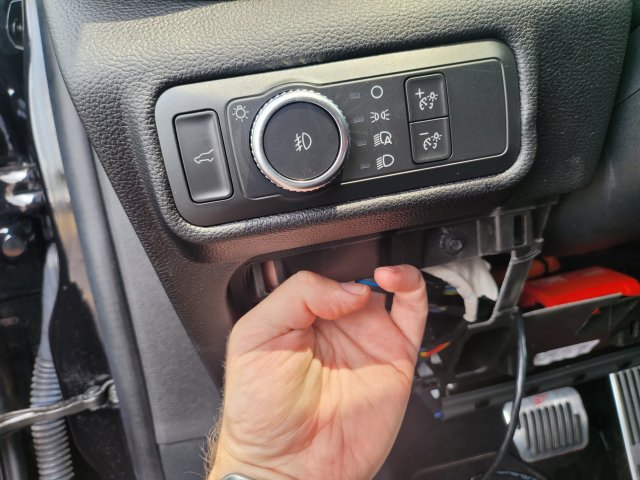
First, pop-out the lighting controls. It's really easy, just stick your hand up behind it and a light push will pop the panel out.
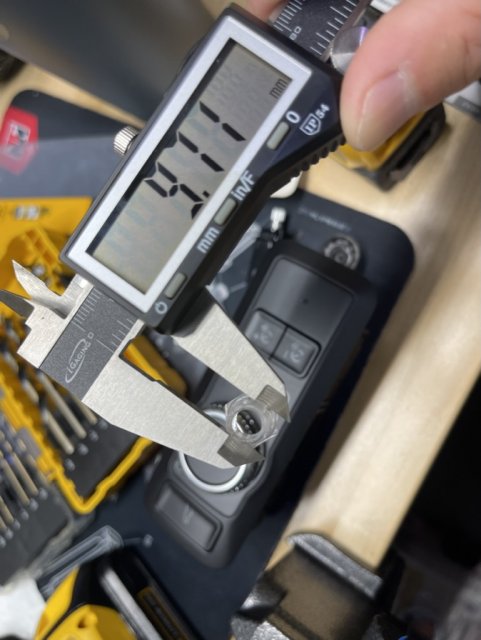
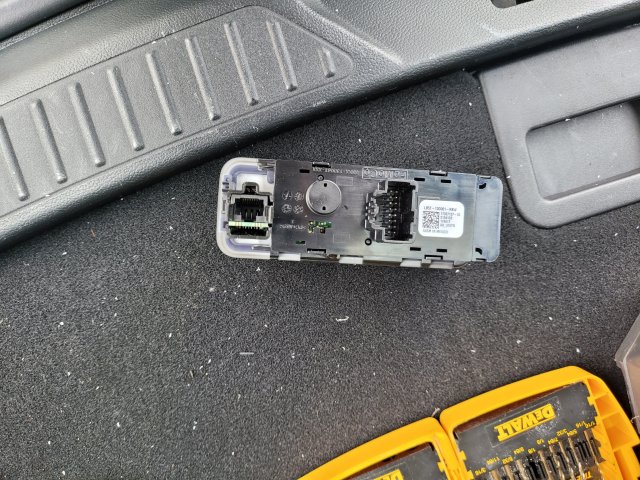
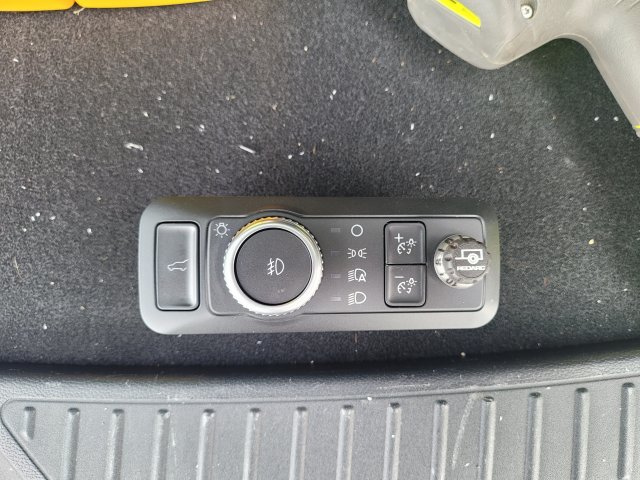
Now, at this point I thought I had pictures of the next stage, but I don't. Fortunately it's really easy to figure out. Unplug the switch assembly and look at the back. You'll see that there is room for the control knob to fit. Just mark and make your holes per the instructions and you'll end up with this:
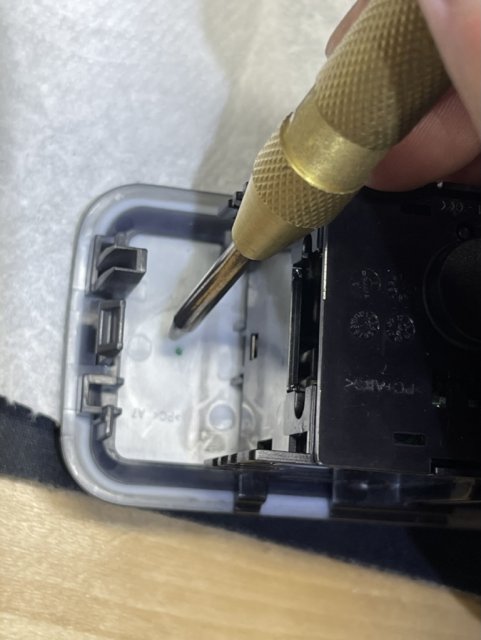
Back side
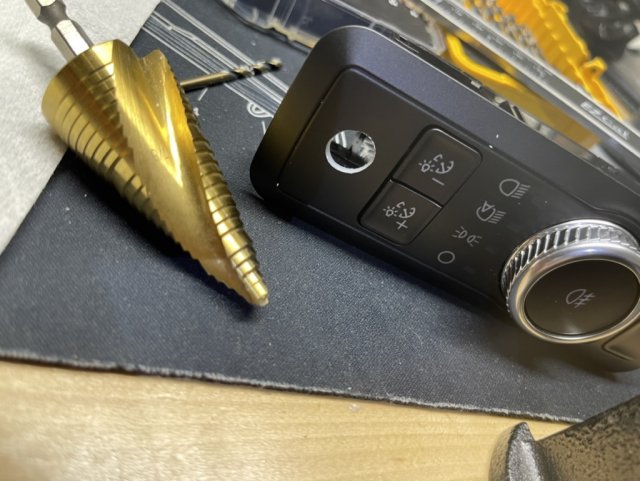
Front side
And then put everything back together.
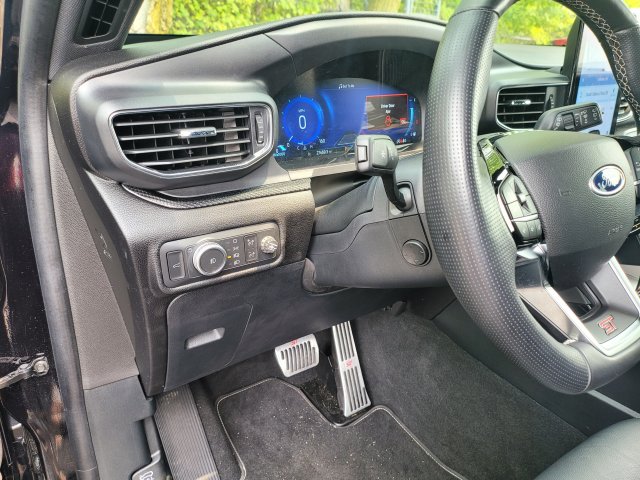
Finished product:
I hope this helps someone in the future. It wasn't difficult to do and only took me about an hour or so.
Thanks for reading.
The most common explanation of where to find the plug is "by your right knee" which was way off and would have led me to searching behind the center waterfall or by the column. I've also read that it was "taped to something" to hide it out of the way. I found both to be incorrect.
Finding the socket for the trailer brake control harness.
First step, remove the lower dash panel and the kick panel above the pedals. There is one visible 7mm bolt by the driver's knee, and another hidden behind the fuse panel cover. By the pedals there's a 10mm nut against the firewall and a 10mm bolt going towards the trans tunnel. Finally there's a christmas tree fastener right below where you removed the first bolt. Pop the lower dash panel free and work the kick panel out. There are two wires connected to the panels, one for a light above the pedals and the other for the OBD-II port.

Disconnect the plug for the lamp, and use a flat screwdriver to release one of the tabs holding the OBD-II port into the bracket and it'll pop right out. Put the panel aside.
If you stick your head under there, or a mirror/camera, you'll find the plug for a trailer brake controller right above the brake pedal behind the knee air bag and floor vents.

It's the big grey plug in the picture. It's mounted to a cross bar there, you don't need to remove it. You'll also see that there's a dummy plug in the socket. Push back the angled tab you see and pull out the dummy plug.

The dummy plug.
Now you can plug in your trailer brake controller harness and proceed with the install.
Installing the Redarc Tow-Pro (Liberty or Elite).
I went with the Liberty over the Elite because I don't plan to tow off-road, and the Liberty still allows me to manually trigger moderate braking to reduce sway if needed. But both versions are identical dimensionally so this install will work with either.
Plugged in the harness:

Secured to the column harness:

Then I coiled the excess, connected it to the Tow-Pro. I also connected the cable for the control knob and then mounted the Tow-Pro with 3M rivet tape to the top of the knee air bag. The bag expands from the bottom, so this won't interfere with deployment.

Now to mount the control knob. I got the idea of where to mount it from the Bronco forums. It looks like Ford offeres an accessory trailer brake controller for the Bronco that is just a rebranded Redarc Tow-Pro Elite. They mount the knob in with the headlight controls and it looks really good. So I decided to mount mine the same way.
First, pop-out the lighting controls. It's really easy, just stick your hand up behind it and a light push will pop the panel out.

Now, at this point I thought I had pictures of the next stage, but I don't. Fortunately it's really easy to figure out. Unplug the switch assembly and look at the back. You'll see that there is room for the control knob to fit. Just mark and make your holes per the instructions and you'll end up with this:
Back side

Front side

And then put everything back together.
Finished product:

I hope this helps someone in the future. It wasn't difficult to do and only took me about an hour or so.
Thanks for reading.
-
10
- Show All

