I’m considering doing a set of RacingBrake front braided brake lines as part of the GT500 front brake upgrade on my ST. I’ve read a few anecdotal mentions of the soft line to hard lines fittings being a real PITA, but I haven’t seen any install tips or even much explanation as to exactly why it’s so difficult. That being said, does anyone have any feedback or input on how to replace the front brake lines?
-
Sign Up! To view all forums and unlock additional cool features
Welcome to the #1 Explorer ST Forum and Explorer ST community dedicated to Explorer ST owners and enthusiasts. Register for an account, it's free and it's easy, so don't hesitate to join the Explorer ST Forum today!
Install tips for front brake line replacement?
- Thread starter THNX SVT
- Start date
+1 on the brake fluid! And rags and brake cleaner . Also make sure you don’t let the brake reservoir run dry. Bleeding after a line change is bad enough, you don’t want to bleed the master if you dont have to. My vacuum bleeder has a bottle I install upside down into the reservoir.
Sent from my iPhone using Tapatalk
 . Also make sure you don’t let the brake reservoir run dry. Bleeding after a line change is bad enough, you don’t want to bleed the master if you dont have to. My vacuum bleeder has a bottle I install upside down into the reservoir.
 Sent from my iPhone using Tapatalk
Thread Starter
#4
Thread Starter
#4
I wanted to share an update on the front brake line install. Thank you again to @UNBROKEN and @Cruising68 for your install tips as that helped immensely.
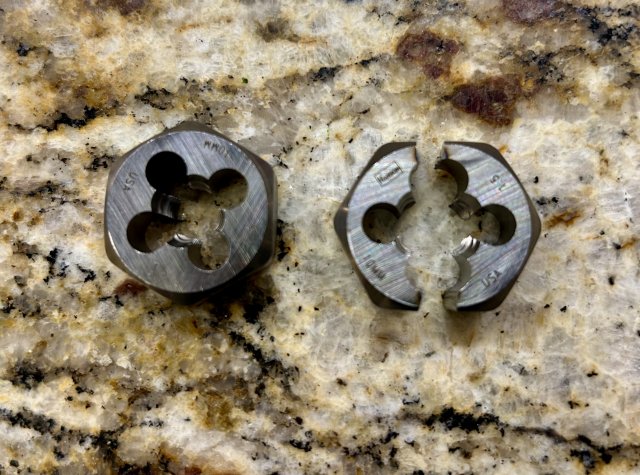
It’s no joke that the threads for the flare nuts on the hard lines are beat up from some kind of weird/aggressive install method at the factory. It ends up making the flare nuts slightly oval shaped and mangles the treads a bit. I have installed a bunch of brake lines over the years and had never seen anything like this from the factory. You’ll definitely want a M10-1.5 die. I purchased 2 Irwin brand dies from Amazon and cut one in half using a cutoff wheel. I believe that tip (cutting a die in half) was from @UNBROKEN on another thread somewhere but I apologize if I’m mistaken and it wa someone else.
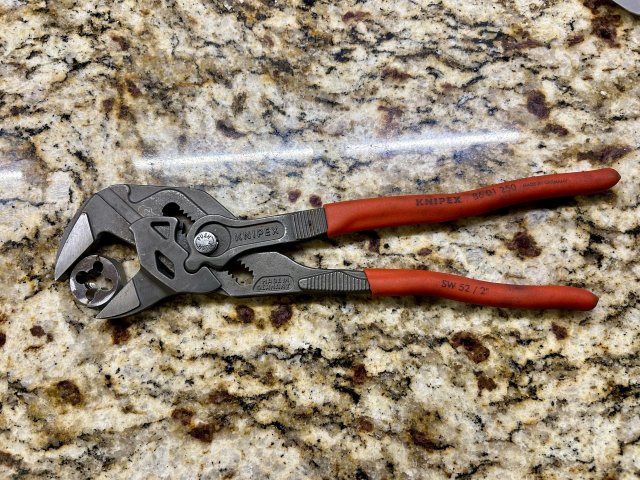
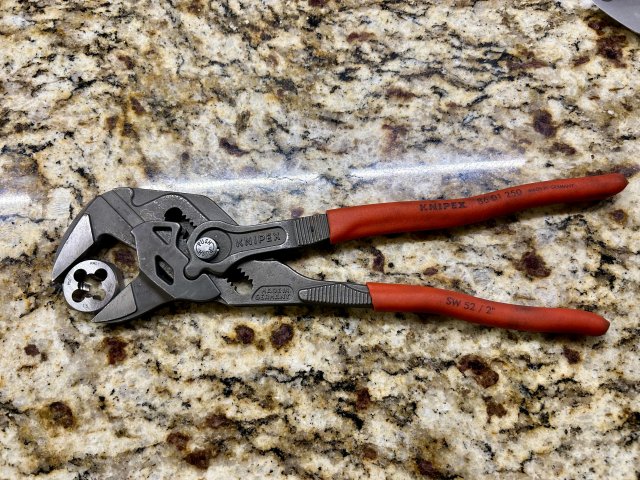
Cutting the one die in half allowed me to place it around the base of the flare nut, and then unscrew the nut it to clean up the threads a bit. I skipped using a die stock, and instead used a pair of Knipex 7 1/4 pliers to hold it. These are basically fancy slip-joint pliers, and using them allowed me to selectively apply pressure to the two die pieces as I worked to initially clean up the threads. Once I did that, I was then able to thread the intact die onto the flare nut the “correct” way to complete the clean up of the threads on the flare nut. Plan for each flare nut to take 5-15 minutes to complete the process.
I had someone on hand to keep an eye on the fluid level, but did not lose much at all. That’s likely because I plugged the end of the factory line with a tapered tip meant to seal a tube of caulk. It was easy enough to work around this while I cleaned up the threads of the flare nut, then just pull the that back out once I was ready to thread on the new line.
Hopefully this recap plus the great tips from the others helps people in the future!
Attachments
-
1.9 MB Views: 25
-
4.5 MB Views: 26
-
4.4 MB Views: 25
-
5
- Show All


